Trades in the construction schedule
In brief: trades such as structural work, electrical or sanitary mark construction phases and work items in the construction schedule by colour and can be filtered specifically. You manage trades in the project settings and assign them on all levels in the construction schedule (in the schedule only with an Expert licence); the chosen colour applies across projects.
Prerequisites: any user with a Smart or Expert licence can create, activate and assign trades. A user with a Smart licence uses trades for records and tasks but cannot do anything in the construction schedule. A user with an Expert licence can use the same trade in the construction schedule too (assign, colour, filter). Viewers and Teamworkers can read and download the construction schedule including colours. Trades are managed in the project settings.
What are trades?
Trades are the individual specialist or work areas of a construction project (structural work, electrical, sanitary, external works). Each trade can be given its own colour, visible in the construction schedule. That shows you at a glance which trade works when and where dates overlap.
Activate, edit and colour trades
You manage trades in the project settings.
- Activate: set the slider next to the trade you want to yellow.
- Edit: click the trade’s name to rename it.
- Change colour: click the colour field. In the colour picker you choose between the RGB, HLS and HEX modes (for example #FF5733) or take a colour from the browser window with the eyedropper.
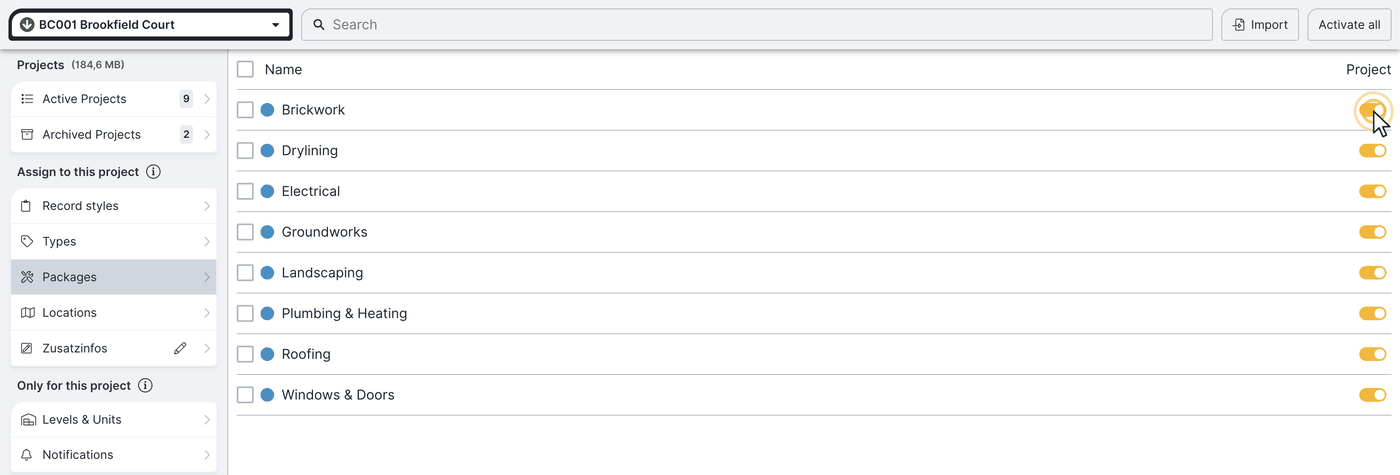
Good to know: the trade colour applies across projects. Whether you change the colour in the project settings or when creating a phase — the change takes effect everywhere.
Assign trades in the construction schedule
You assign a trade to construction phases, work items and milestones. There are two ways:
- Click the empty area next to the work item in the trade column and choose a trade.
- Or double-click the work item in the construction schedule and change the trade in the dialog that follows.
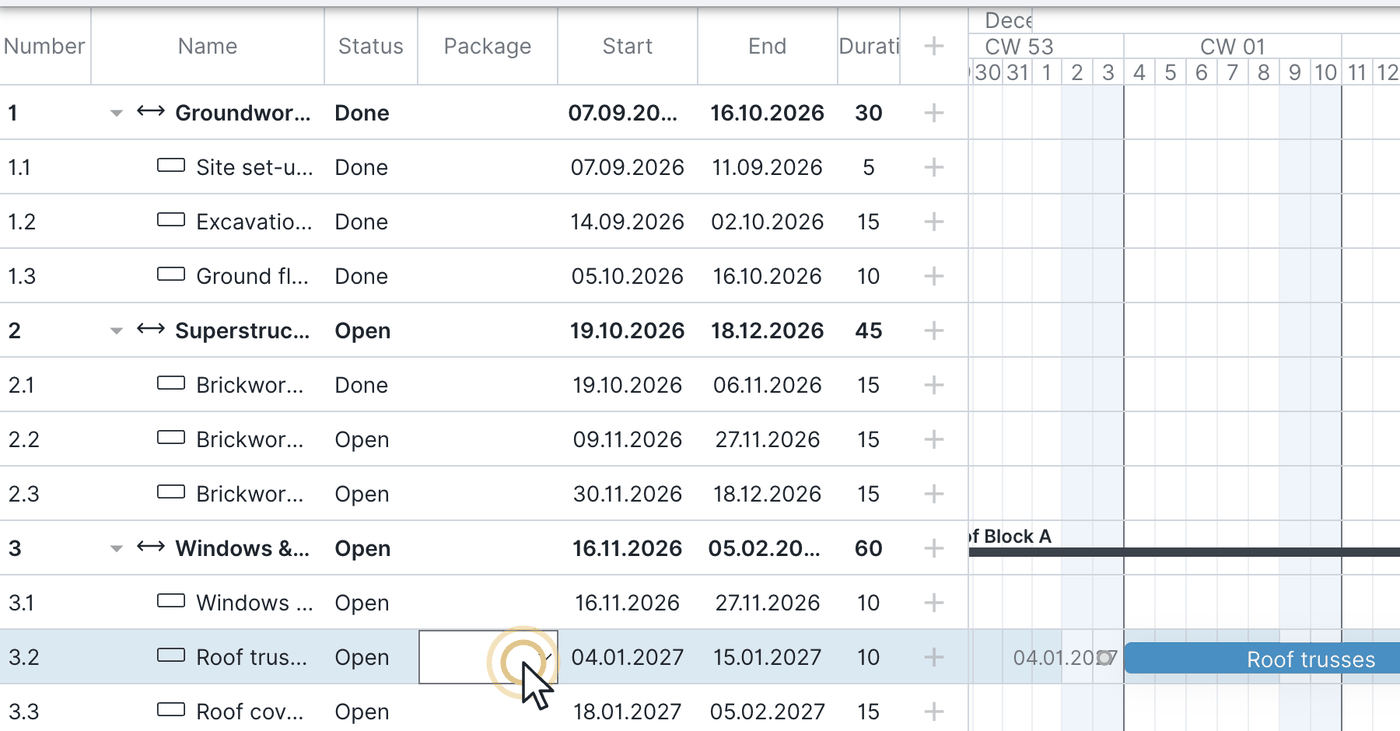
On every level of the construction schedule a separate trade can be defined, for example:
- Construction phase
- Construction phase/section
- Work item
- Sub-item
- Milestone
Filter by trade
Use the funnel symbol in the icon bar to filter the construction schedule by specific trades — only the assigned construction phases, work items and milestones are then shown. An active filter is recognisable by the slightly grey-shaded funnel symbol.
Attention: if you assigned a trade to a work item but not to the related sub-item, the sub-item is not shown when filtering by that trade. So assign trades on all relevant levels.
FAQ
Why is my sub-item not shown when filtering by a trade?
The sub-item has no trade of its own assigned. The filter only shows entries with a directly stored trade — assign the trade to the sub-item as well.
Does a colour change only apply to the current project?
No, a trade’s colour applies across projects.
On how many levels can I assign trades?
Up to five: construction phase › construction phase/section › work item › sub-item › milestone.
Where do I manage my trades?
In the project settings — there you activate, name and colour trades.
Can I use trades in the construction schedule as a Smart user?
No. A user with a Smart licence can create, activate and assign trades, but only for records and tasks; in the construction schedule they cannot do anything. A user with an Expert licence can use the same trade in the construction schedule too.
Keywords: trades construction schedule